Introduction
In the ever-evolving world of interior design and home improvement, self-adhesive window films have emerged as a versatile and cost-effective solution for a variety of needs. These thin, adhesive-backed films offer a range of benefits, from enhancing privacy and adding a decorative touch to improving energy efficiency and protecting against harmful UV rays. Most are sold at local big box stores such as Home Depot or can be ordered online. Whether you’re a seasoned DIY enthusiast or just looking for a simple yet impactful way to upgrade your living space, this comprehensive guide will walk you through the ins and outs of installing self-adhesive window films.
Unveiling the Power of Self-Adhesive Window Films
Imagine a window treatment that not only transforms the look and feel of your space but also serves practical purposes like reducing energy consumption and increasing your sense of privacy. Self-adhesive window films are precisely that—an innovative solution that combines aesthetics, functionality, and ease of installation.
Benefits That Go Beyond Aesthetics
Beyond the aesthetic appeal of a decorative window film, these films offer a range of valuable benefits that make them a go-to choice for homeowners and renters alike. By allowing you to control the amount of light that enters a room while maintaining your desired level of privacy, these films offer a unique blend of convenience and customization. Moreover, they provide protection against harmful UV rays that can damage furnishings and fabrics over time, all while improving the energy efficiency of your living space.
The DIY Advantage
One of the standout features of self-adhesive window films is that they are relatively user-friendly to install. Unlike more complex window treatments or commercial grade window films, installing these off the shelf films requires minimal tools and expertise. This guide aims to demystify the installation process, equipping you with the knowledge and techniques to achieve professional-looking results without the need for professional assistance.
Your Path to Transformative Home Enhancement
Whether you’re seeking increased privacy, a stylish décor update, or a smarter way to manage sunlight and energy, self-adhesive window films offer an accessible and economical solution. This guide will take you step-by-step through the process of measuring, preparing, and applying these films to your windows, ensuring that you’re well-prepared to undertake this rewarding DIY project.
From choosing the right type of film for your needs to troubleshooting common issues, our comprehensive guide covers every aspect of self-adhesive window film installation. By the end of your journey through this guide, you’ll not only have transformed your living space but also gained the confidence to explore the boundless possibilities that self-adhesive window films have to offer. So, let’s dive into the world of self-adhesive window films and unlock a new dimension of interior design and comfort.
1. Understanding Self-Adhesive Window Films
Before embarking on the journey of installing self-adhesive window films, it’s essential to have a solid grasp of what these films are and the myriad benefits they bring to your living space. In this section, we’ll delve into the various types of self-adhesive window films available, explore the composition of these films, and understand how they can enhance both the aesthetics and functionality of your windows.
Types of Self-Adhesive Window Films
Self-adhesive window films come in an array of types, each designed to cater to specific needs and preferences. These types include:
- Privacy Films: These films obscure the view from the outside while allowing light to filter through, making them ideal for bathrooms, bedrooms, and spaces where privacy is paramount.
- Decorative Films: Adding a touch of elegance, these films offer a range of patterns, designs, and textures, transforming your windows into decorative focal points.
- Solar Control Films: Engineered to reduce glare and regulate indoor temperatures, solar control films help in managing energy consumption while maintaining a comfortable living environment.
- Security Films: These specialized films add a layer of protection to your windows, making them more resistant to breakage and preventing shattered glass from scattering.
Composition and Opaqueness Levels
Self-adhesive window films are typically composed of several layers that contribute to their unique properties. These layers may include:
- Base Layer: The foundation of the film, providing structural integrity and stability.
- Adhesive Layer: A specially formulated adhesive that ensures the film adheres securely to the glass surface.
- Design Layer: Present in decorative films, this layer features patterns, designs, or colors that add visual interest.
- Protective Layer: Often an outermost layer, this protective coating shields the film from scratches, UV rays, and environmental factors.
The opaqueness level of the film dictates how much light it allows to pass through. Ranging from transparent to highly opaque and even 100% blackout, you can choose a film that aligns with your desired level of privacy and light diffusion.
Customization Options
Self-adhesive window films offer a world of customization, allowing you to tailor the appearance of your windows to match your décor style and functional needs. Some films can be cut to fit any window shape or size, providing flexibility for uniquely shaped or non-standard windows. This customization extends to the design and aesthetic, enabling you to select a film that complements your interior design scheme.
As we move forward in this guide, you’ll discover how to select the right type of self-adhesive window film for your specific requirements and learn the intricate steps needed to achieve flawless installation. Whether you’re looking to add an artistic flair to your windows or seeking enhanced privacy, self-adhesive window films offer a versatile solution that empowers you to transform your living space.
2. Tools and Materials You’ll Need
Now that you have a foundational understanding of self-adhesive window films, it’s time to gather the essential tools and materials that will facilitate a smooth and successful installation process. Proper preparation is key to achieving professional-looking results, and having the right equipment on hand will ensure that the installation goes off without a hitch.
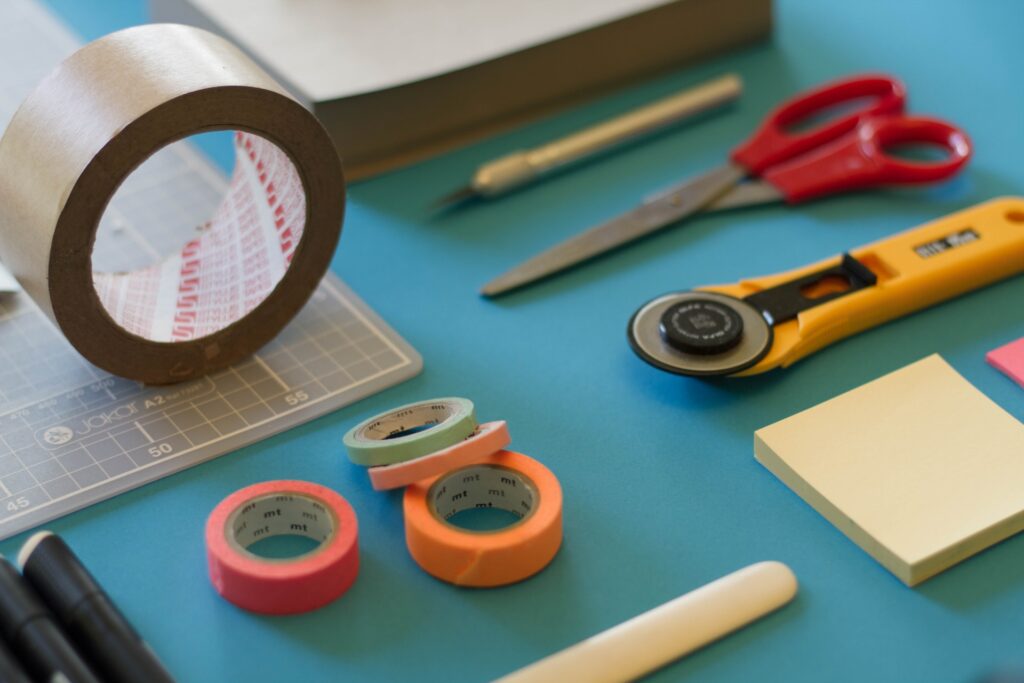
Comprehensive List of Installation Tools
- Measuring Tape: Accurate measurements are crucial for achieving a perfect fit. A measuring tape ensures you get the dimensions right.
- Utility Knife: A sharp utility knife is essential for cutting the film to the correct size and trimming excess material.
- Squeegee: This tool is used to smooth out the film, remove air bubbles, and ensure proper adhesion to the glass surface.
- Spray Bottle: Filled with a diluted soapy water solution, the spray bottle helps position the film and prevents it from sticking prematurely.
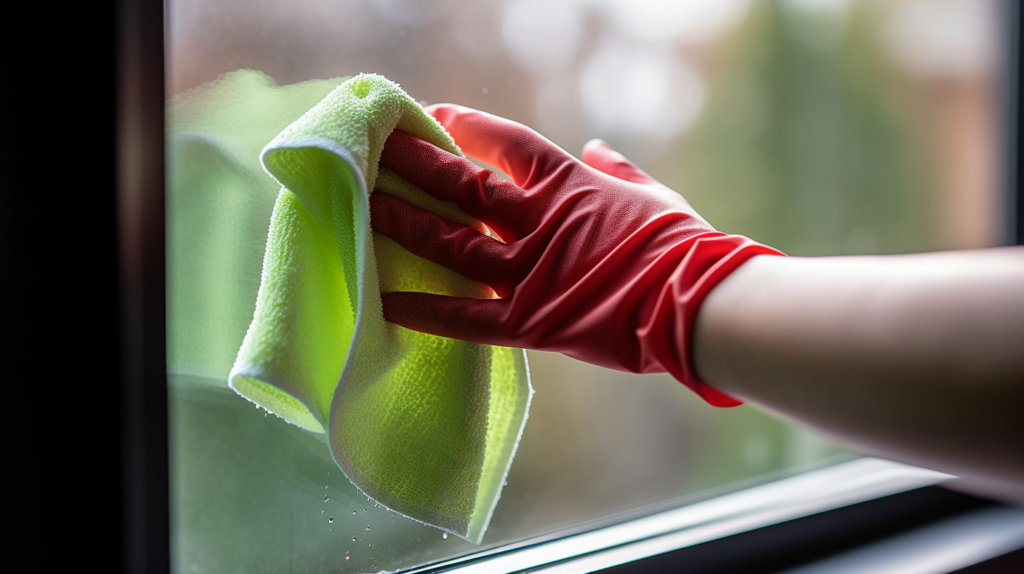
- Lint-Free Cloth or Microfiber Towel: Use these to wipe the glass clean before applying the film, ensuring a dust-free and smooth surface.
- Ruler or Straight Edge: A ruler or straight edge aids in creating precise and straight cuts on the film.
- Level: Ensures that the film is applied evenly and straight, avoiding crooked installations.
- Masking Tape: Can be used to temporarily hold the film in place while you make adjustments.
- Hair Dryer or Heat Gun: Useful for gently heating the film to aid in reshaping and removing stubborn wrinkles.
- Protective Gloves: Optional, but wearing gloves can help prevent fingerprints and smudges on the film.
Creating a Clean and Dust-Free Workspace
Before diving into the installation process, it’s crucial to set up a clean and organized workspace. Follow these steps:
- Clear the Area: Remove any obstacles or furniture near the windows to allow ample space for manoeuvring.
- Clean the Glass: Thoroughly clean the windows with soapy water to remove dust and grime. A clean surface ensures proper adhesion. It is very important not to use glass cleaners such as Windex and similar products. Glass cleaners often contain surfactants and sometimes even silicone based substances which can make your film not fully adhere or prematurely fail.
- Clean the frame and mullions: There is always a lot of hidden dirt and debris between the glass and the frame, especially at the bottom of the window. Try spraying directly with a powerful jet of water from your sprayer to dislodge this, and soak it up with a paper towel.
- Eliminate Dust: Wipe down the surrounding area to reduce the risk of dust particles getting trapped under the film during installation.
By having these tools and materials at your disposal and preparing your workspace meticulously, you’re setting yourself up for success as you move forward with the installation process. With the right equipment and a focused approach, you’ll be well-prepared to tackle each step with confidence and precision.
3. Preparing for Installation
Proper preparation is the foundation of a successful self-adhesive window film installation. This section will guide you through the crucial steps to ensure that your windows are ready to receive the film and that you have all the necessary information at your fingertips.
Accurate Measurement Techniques
Before you begin cutting the window film, accurate measurements are essential to ensure a snug and seamless fit. Follow these steps:
- Measure Twice: Use a measuring tape to measure the height and width of each window. Measure at multiple points to account for any variations.
- Add Overlap: Add a small amount (about 1/4 – 1/2 inch or 6 – 12mm) to both the height and width measurements to allow the film to slightly overlap the window frame.
- Record Measurements: Note down the measurements for each window, and label them to avoid confusion.
Removal of Existing Window Treatments
If you have existing window treatments such as blinds, curtains, or old window films, you’ll need to remove them before installing the new self-adhesive film:
- Blinds and Curtains: Follow the manufacturer’s instructions to safely remove blinds and curtain hardware. Store them carefully if you plan to reuse them.
- Old Window Films: If you have existing window film, carefully peel it off from the corner of the glass. Use a razor blade or utility knife to help lift the film if necessary.
By meticulously preparing your windows, taking accurate measurements, and ensuring a clean surface, you’re laying the groundwork for a successful self-adhesive window film installation. With these steps completed, you’re now ready to move on to the exciting phase of applying the film to transform your windows and elevate your living space’s aesthetics and functionality.
4. Step-by-Step Installation Guide
Welcome to the heart of the installation process—the step-by-step guide that will take you through the journey of applying self-adhesive window films to your windows. Each step is crucial to achieving a smooth, bubble-free, and professional-looking result. Let’s dive in!
Note: This section will provide detailed explanations for each step.
Step 1: Precise Cutting of Film
Accurate cutting is the foundation of a successful installation. Follow these steps:
- Place Film on a Flat Surface: Unroll the film on a clean and flat surface with the adhesive side facing up.
- Measure and Mark: Using your measurements from earlier, use a ruler or straight edge to mark the dimensions on the film. Ensure the film is aligned straight and your pieces are cut squarely.
- Cutting the Film: With a sharp utility knife, carefully cut along the marked lines. Use slow, steady pressure to ensure clean and straight cuts.
Step 2: Handling and Preparing the Film
Proper handling prevents wrinkles and creases. Here’s how to prepare the film for installation:
- Peel Backing: Gently peel back a small portion of the protective backing from one corner of the film. Be careful not to touch the adhesive side. Having a second person to help is really a lifesaver for this step! Be careful, peeling the backing often creates static and can attract dust, hair or small particles close to the film.
- Spray Soapy Water: Lightly mist the adhesive side with the soapy water solution. This helps prevent the film from sticking prematurely. Also lightly mist the window where you are placing the film.
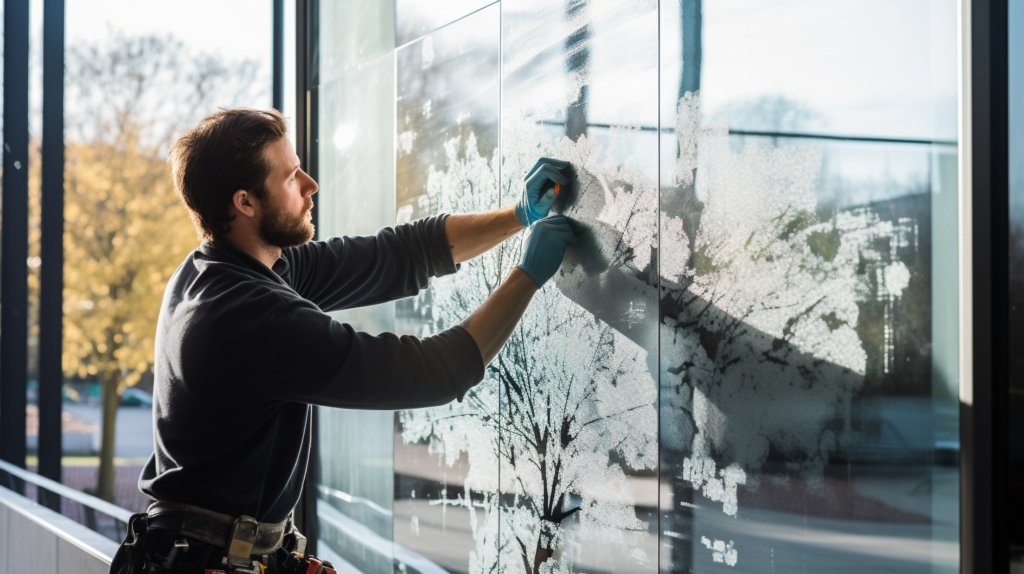
Step 3: Applying the Film
Now, it’s time to apply the film to the window:
- Positioning the Film: Align the film with the top of the window and gently press the wet adhesive side onto the glass surface.
- Sliding into Place: Use your fingers to slide the film into its proper position, adjusting as needed to align with the edges of the window.
Step 4: Smoothing and Squeegeeing
Removing air bubbles and the soapy water solution from behind the film, you will need to work methodically but fairly swiftly to ensure you remove as much of the water and trapped air before the film adheres:
- Squeegee Technique: Starting from the centre and working outward, use long squeegee strokes to push out air bubbles and excess water. Use firm but gentle pressure.
- Gradual Approach: Work your way from the top to the bottom, ensuring the film adheres evenly as you go.
Step 5: Trimming Excess Film
Achieve clean edges and a professional finish by trimming the excess film:
- Trimming Technique: With the film securely in place, use a utility knife to carefully trim along the edges of the window frame. You can use your squeegee as a guide or a ruler to help keep things straight.
- Caution: Exercise caution while trimming, ensuring the knife doesn’t scratch the glass or damage the film. Corners can especially be tricky, use scissors to cut the film at a 45 degree from the edge of the film which will allow it to push into the corners a little easier.
With these steps completed, you’ve successfully applied the self-adhesive window film to your window. The result should be a clear and beautiful transformation that enhances both the aesthetic appeal and functionality of your space. But our journey isn’t over yet—continue reading to learn about maintenance, troubleshooting, and how to maximize the benefits of your new window film.
5. Maintenance and Troubleshooting
Congratulations on successfully installing your self-adhesive window film! To ensure its longevity and continued effectiveness, proper maintenance and the ability to troubleshoot common issues are crucial. In this section, we’ll explore maintenance techniques to keep your window film looking its best and provide solutions to address any challenges that may arise.
Maintenance Tips for Window Films
- Regular Cleaning: Gently clean the film using a soft, non-abrasive cloth or sponge and a mild detergent. Avoid using harsh chemicals that could damage the film’s protective layer.
- Avoid Abrasive Materials: Do not use abrasive materials, brushes, or scouring pads to clean the film, as these could scratch or damage the surface.
- Cleaning Solutions: Opt for mild, non-ammonia-based cleaning solutions. You can also make your own cleaning solution using a mixture of water and a small amount of dish soap.
- Avoid Direct Contact: Refrain from placing adhesive materials directly onto the film, as they could cause damage during removal.
- Mindful Handling: When opening and closing windows, be cautious to avoid scraping or scratching the film with window frames or hardware.
Troubleshooting Common Issues
- Air Bubbles: If you notice air bubbles under the film, use a squeegee to gently push them towards the edges. If the bubbles are persistent, carefully lift the affected area and reapply while smoothing out the film.
- Wrinkles: If wrinkles appear during installation or over time, use a hair dryer or heat gun on low heat to gently heat the film and smooth out the wrinkles with a squeegee.
- Peeling Edges: If the film starts to peel at the edges, gently lift the affected area and apply a small amount of water underneath using a spray bottle. Press the film back into place and squeegee out excess water.
- Discoloration or Fading: If your film begins to show signs of discoloration or fading due to prolonged exposure to sunlight, consider investing in UV-protective window films.
- Film Damage: If the film becomes damaged beyond repair, you may need to carefully remove it using a utility knife and adhesive remover. Follow manufacturer guidelines for safe removal.
By incorporating these maintenance practices and troubleshooting techniques into your routine, you’ll ensure that your self-adhesive window film continues to enhance your living space’s aesthetics and functionality for years to come. Remember, proper care contributes to the film’s longevity and your overall satisfaction with the installation process.
6. Maximizing the Benefits of Self-Adhesive Window Films
Now that your self-adhesive window film is securely in place, it’s time to explore the various ways you can maximize the benefits it brings to your living space. In this section, we’ll delve into the multiple advantages of window films beyond their aesthetic appeal and provide insights into how to make the most of your investment.
Enhancing Privacy and Security
- Privacy Solutions: Utilize privacy films to transform your windows into effective privacy screens without sacrificing natural light.
- Security Boost: For added security, consider security window films that reinforce the glass, making it more resistant to breakage and shattering.
Energy Efficiency and UV Protection
- Solar Control Films*: Embrace the energy-saving potential of solar control films, which regulate indoor temperatures and reduce cooling costs.
- UV Protection: Protect your furnishings and interior décor from fading and damage caused by UV rays by using UV-protective window films.
*It is important to note that we highly recommend you seek professional advice before installing interior solar films as installation on modern double or triple glazing can result in thermal shock of the window unit making the glass shatter due to reflected solar energy from the film.
Natural Light Management
- Glare Reduction: Solar control films can reduce glare, making it more comfortable to work or relax near windows.
- Natural Daylighting: Utilize window films that maintain a balance between privacy and natural daylight, creating a harmonious environment.
Creative Design and Aesthetics
- Decorative Films: Experiment with a wide range of patterns and designs to add a unique touch to your living space.
- Artistic Expression: Consider custom designs or create your own unique patterns to reflect your personal style.
By thoughtfully incorporating these strategies, you can fully embrace the potential of self-adhesive window films, turning them into a transformative feature that adds value to your living space. Whether you’re prioritizing privacy, energy efficiency, or enhancing aesthetics, window films offer a flexible and adaptable solution that caters to your lifestyle and preferences.

7. Exploring Creative Applications
Self-adhesive window films open the door to a realm of creative possibilities beyond their traditional use. In this section, we’ll explore innovative and unique applications that go beyond the conventional, allowing you to make a bold statement with your windows and enhance your living space’s overall ambiance.
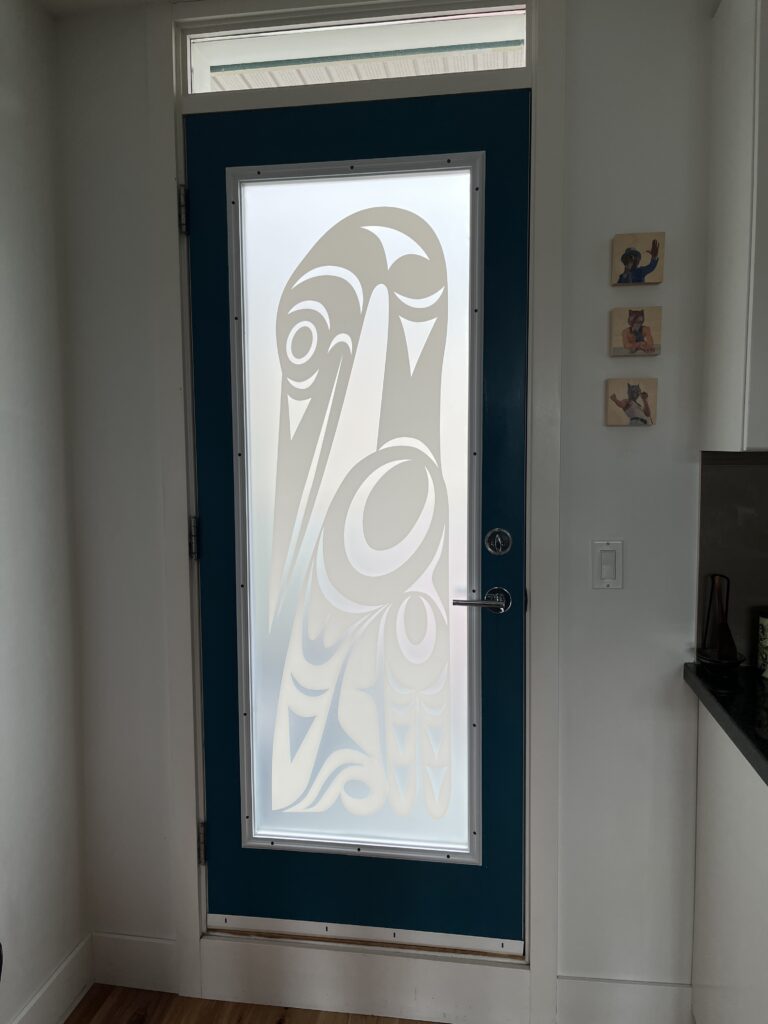
Stained Glass Effect
- Imitating Stained Glass: Use decorative window films with intricate patterns to mimic the look of stained glass windows.
- Custom Designs: Create your own stained glass-inspired designs for a personalized touch.
Faux Etched Glass
- Elegant Etched Glass Look: Choose window films that mimic the appearance of etched glass, adding an elegant and sophisticated touch.
- Privacy and Style: Achieve privacy without sacrificing aesthetics by opting for etched glass-style window films.
Window Art and Murals
- Dynamic Window Murals: Transform your windows into captivating art pieces with window murals.
- Seasonal Themes: Change window murals according to seasons or special occasions for a dynamic interior.
Functional Room Dividers
- Dividing Spaces: Use window films to create stylish and functional room dividers.
- Maintaining Openness: Enjoy the benefits of separation while still allowing light to pass through.
Enhanced Glass Cabinets
- Decorating Glass Cabinets: Apply decorative films to glass cabinet doors to enhance their visual appeal.
- Conceal Clutter: Obscure the contents of cabinets while adding a touch of sophistication.
Bathroom Upgrade
- Shower Privacy: Apply privacy window film to bathroom windows or shower enclosures for enhanced privacy.
- Customized Designs: Choose frosted or decorative films to create a spa-like ambiance in the bathroom.
Beyond Standard Windows
- Mirrored Surfaces: Apply window film to mirrored surfaces for a refreshed appearance and added functionality.
- Glass Tables: Experiment with film on glass table tops for unique and customizable designs.
By exploring these creative applications, you can unleash your imagination and utilize self-adhesive window films as versatile tools for transforming various areas of your home. Whether you’re looking to add a touch of elegance, express your artistic side, or reimagine the functionality of different spaces, window films offer an exciting canvas for innovation and self-expression.
8. Frequently Asked Questions
As you embark on your journey to install self-adhesive window films, you might encounter questions and concerns along the way. Here, we address common queries to provide you with the insights you need for a successful installation.
Q1: Can I install window films on any type of glass?
A: While window films can be applied to most types of glass, it’s essential to check the manufacturer’s guidelines. Some films may not adhere well to textured or frosted glass surfaces.
Q2: How do I remove air bubbles during installation?
A: To remove air bubbles, gently press the film with a squeegee from the centre outwards. For stubborn bubbles, carefully lift the film and reapply, smoothing it as you go.
Q3: Can I install window films on double-pane windows?
A: It’s generally recommended to avoid installing window films on double-pane windows, as they can trap heat and potentially damage the window seals. Always check with the manufacturer.
Q4: How do I clean window films after installation?
A: Gently clean window films using a soft cloth and a mild detergent. Avoid abrasive materials and harsh chemicals that could damage the film.
9. DIY vs. Professional Installation
The decision to install self-adhesive window films yourself or hire a professional depends on various factors. Let’s explore the pros and cons of each option.
DIY Installation
Pros:
- Cost-effective: DIY installation saves money on professional labour costs.
- Flexibility: You have control over the process and timeline.
- Learning Opportunity: Installing window films yourself can be a rewarding learning experience.
Cons:
- Skill Required: DIY installation requires careful attention to detail, some tools and equipment and a steady hand.
- Potential Mistakes: Errors during installation could lead to air bubbles or imperfections and in some cases require extra material which can add to your costs.
- Time-Consuming: DIY installation might take longer, especially if you’re new to the process.
Professional Installation
Pros:
- Expertise: Professionals have experience and skill in achieving flawless installations. Ad install guarantees all of their installations
- Time-Saving: Professional installers work efficiently, completing the job quickly.
- Quality Assurance: Professionals ensure that the film is correctly applied, minimizing issues.
Cons:
- Cost: Hiring professionals does incur additional costs beyond the price of the film.
- Scheduling: You’ll need to coordinate with the installer’s availability
Ultimately, the choice between DIY and professional installation depends on your comfort level, available time, and desired outcome. If you’re confident in your abilities and want to enjoy a hands-on project, DIY might be the way to go. On the other hand, if you value a seamless and professionally finished result, enlisting the help of experts can provide peace of mind.
10. Safety Considerations
Safety is paramount during any DIY project, and installing self-adhesive window films is no exception. Here, we outline key safety considerations to ensure a secure and worry-free installation process.
Safety Gear: Wear protective gloves to prevent fingerprints on the film and safety goggles to shield your eyes from any potential debris.
Sharp Tools: Exercise caution while using sharp tools like utility knives to avoid accidents. Always cut away from your body and keep fingers clear of the blade.
Ladder Safety: If your windows are at a height that requires a ladder, make sure the ladder is stable, on an even surface, and follow proper ladder safety guidelines.
Ventilation: If using adhesive removers or cleaning solutions, ensure adequate ventilation to prevent inhaling fumes.
Protecting Furniture: Cover furniture and flooring near the installation area to prevent accidental damage from tools or adhesive residue.
11. Adhering to Local Regulations
Before you begin your window film installation, it’s essential to familiarize yourself with any local regulations or guidelines that might apply. Some areas may have restrictions on the type of films allowed or specific requirements for safety and visibility. Contact your local authorities or consult relevant building codes to ensure compliance with the law.
12. Removing and Replacing Window Films
Over time, you might need to replace or remove your self-adhesive window films. To do so, follow these steps:
- Peel Film Gently: Starting from a corner, gently peel the film away from the glass at a 45-degree angle.
- Adhesive Residue: If adhesive residue remains on the glass, use an adhesive remover or a mixture of water and mild detergent to gently clean the surface.
- Reapplication: If you’re reapplying new film, make sure the glass is clean and free from residue before installing the new film.
13. The Longevity of Self-Adhesive Window Films
The lifespan of self-adhesive window films varies depending on factors such as quality, type, and exposure to sunlight. Quality films can last anywhere from 5 to 10 years or even longer with proper maintenance. Regular cleaning, avoiding harsh chemicals, and minimizing exposure to direct sunlight can help extend the lifespan of your window film.
14. Conclusion
Congratulations! You’ve completed your journey through the comprehensive guide to installing self-adhesive window films. By now, you should feel well-equipped with the knowledge and techniques to transform your windows and elevate your living space’s aesthetics, comfort, and functionality. From measuring and preparation to installation and maintenance, you’ve gained the skills to achieve professional-looking results.
As you embark on your window film installation project, remember to take your time, follow the steps diligently, and prioritize safety. The results are bound to be a reflection of your efforts—a living space enhanced by the beauty and advantages of self-adhesive window films. Enjoy your newfound privacy, energy efficiency, and the unique touch of style that these films bring to your home.
If you have got this far and think you might like to have a professional installer handle it from here, we are always happy to provide a quote on residential film installations. You can get in touch with us here.